
Erase and Reinstall macOS – Intel Mac
How to completely erase and reinstall macOS on an Intel-based Mac using Recovery Mode. This process wipes the entire drive and installs a fresh copy of macOS.
Note – This article covers Intel-based Macs only. For Apple Silicon Macs (M1, M2, M3, M4), see the Erase and Reinstall macOS – Apple Silicon Mac article.
When to Use This
- Reprovisioning a Mac for a new user
- Persistent macOS issues that can't be resolved with standard troubleshooting
- Preparing a Mac for return/trade-in/decommission
- Malware remediation requiring a clean install
Before You Start
- Back up any user data that needs to be preserved (Time Machine, cloud sync, manual file copy)
- Sign out of iCloud / Apple Account on the device if possible
- Know the Mac's admin password (needed during Recovery)
- Have a stable internet connection available (Wi-Fi or Ethernet) – required for Internet Recovery and reinstallation
- Plug in the power adapter if using a MacBook
- If a firmware password is set on the Mac, you'll need that password to boot into Recovery
Important – Erasing the disk permanently deletes all data. Verify backups are complete before proceeding.
How to Check if Your Mac is Intel-Based
Click the Apple menu → About This Mac.
- If you see "Processor" followed by an Intel chip name (e.g., Intel Core i5), it's an Intel Mac.
- If you see "Chip" followed by M1/M2/M3/M4, it's Apple Silicon – use the Apple Silicon article instead.
Method 1: Erase All Content and Settings (Quick Method)
Available on Intel Macs with a T2 Security Chip running macOS Monterey 12 or later. This is the fastest option when macOS is still bootable.
Note – Not all Intel Macs have a T2 chip. T2-equipped models include MacBook Air (2018+), MacBook Pro (2018+), Mac mini (2018), Mac Pro (2019), and iMac Pro. If your Mac doesn't have a T2 chip, skip to Method 2.
- Open System Settings → General → Transfer or Reset
- Click Erase All Content and Settings
- Authenticate with the admin password
- Optionally back up with Time Machine when prompted
- Review the summary of what will be erased, then click Continue
- Enter the Apple Account password to sign out of iCloud
- Click Erase All Content & Settings to confirm
The Mac restarts, activates, and presents the Setup Assistant. If preparing for a new user, power off the Mac at the Setup Assistant screen.
Note – If macOS won't boot, the Mac doesn't have a T2 chip, or you need a full disk-level erase, use Method 2 below.
Method 2: Full Erase and Reinstall via Recovery Mode
Use this when macOS won't boot, the Mac lacks a T2 chip, or you need a complete disk-level wipe.
Step 1 – Boot into Recovery Mode
- Click Apple menu → Restart (or press and hold the power button for 10 seconds to force shut down if macOS is unresponsive).
- As the Mac restarts, immediately press and hold one of the following key combinations until you see the Apple logo or a spinning globe:
| Key Combination | What It Does |
|---|---|
| Command (⌘) + R | Boots local Recovery – reinstalls the most recently installed macOS version |
| Option + Command + R | Internet Recovery – installs the latest compatible macOS for your Mac |
| Shift + Option + Command + R | Internet Recovery – installs the macOS that originally shipped with your Mac (or the closest available version) |
Note – Use
Option + Command + Rif you want the newest macOS your Mac supports. UseShift + Option + Command + Rif you need the factory-original macOS version.
- If prompted, connect to a Wi-Fi network using the Wi-Fi menu in the top-right corner, or connect an Ethernet cable.
- If prompted for a firmware password, enter it.
- If asked to select a volume to recover, select your startup disk (usually Macintosh HD) and click Next.
- If asked to select an admin user, choose one, click Next, and enter the login password.
- The Recovery utilities window will appear.
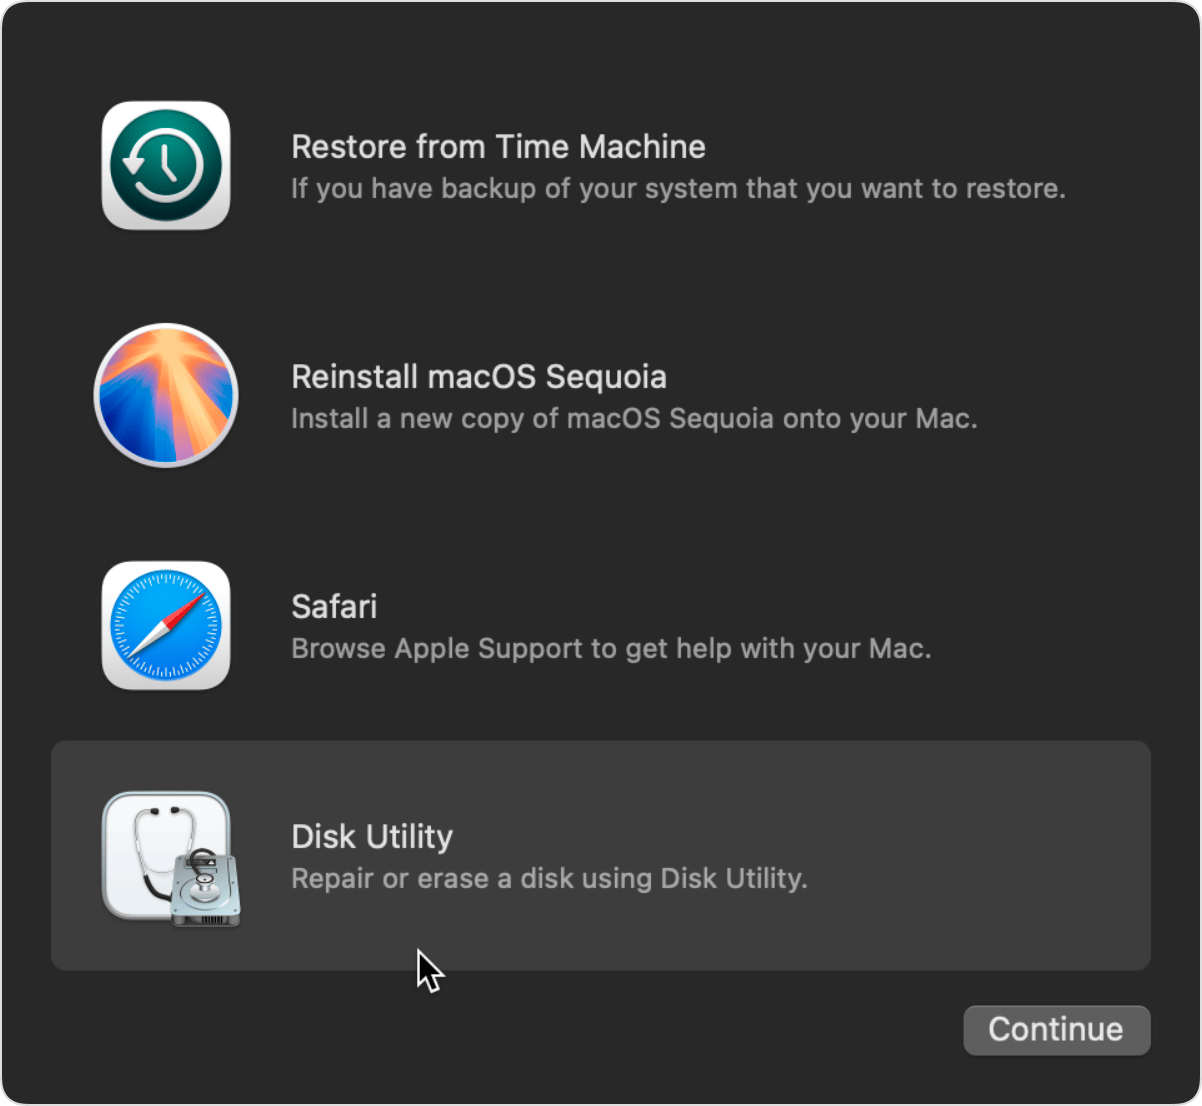
Step 2 – Erase the Disk with Disk Utility
- In the Recovery utilities window, select Disk Utility and click Continue.
- In the sidebar under Internal, select Macintosh HD.
- Click the Erase button in the toolbar.
- Set the following:
- Name:
Macintosh HD - Format:
APFS(recommended for macOS High Sierra and later). UseMac OS Extended (Journaled)if installing macOS Sierra or earlier.
- Name:
- Click Erase Volume Group if the button is shown. Otherwise, click Erase.
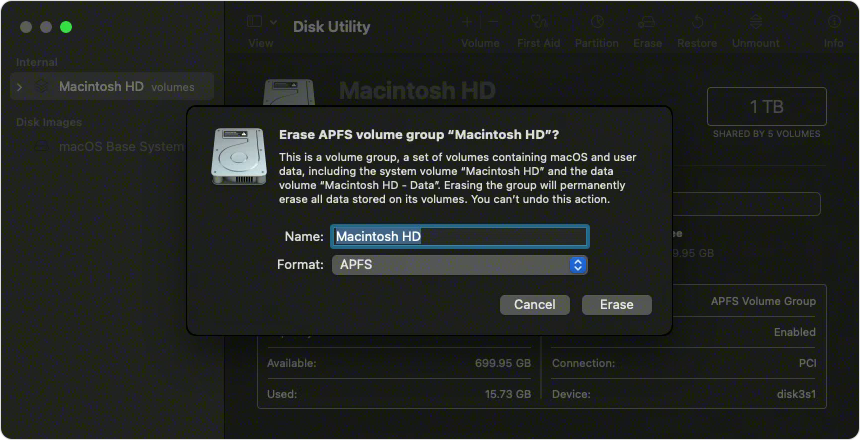
- If prompted, enter Apple Account credentials.
- When the erase completes, click Done.
- Quit Disk Utility: Disk Utility menu → Quit Disk Utility to return to the Recovery utilities window.
Step 3 – Reinstall macOS
- In the Recovery utilities window, select Reinstall macOS and click Continue.
- Follow the on-screen instructions. Accept the license agreement.
- When asked to select a disk, choose Macintosh HD.
- Allow the installation to complete. The Mac may restart multiple times and the screen may appear blank for extended periods – this is normal.
Note – Do not close the lid or put the Mac to sleep during installation. Keep it plugged into power.
- After installation completes, the Setup Assistant will appear. If provisioning for a new user, complete setup. If preparing for handoff, shut down the Mac at the Setup Assistant screen.
Recovery Mode Key Combinations – Which macOS Gets Installed?
| Key Combination | macOS Version Installed | Best Use Case |
|---|---|---|
| ⌘ + R | Most recently installed macOS | Standard reinstall – keeps the same macOS version |
| Option + ⌘ + R | Latest compatible macOS | Upgrade to the newest macOS the hardware supports |
| Shift + Option + ⌘ + R | Original shipping macOS (or closest available) | Downgrade to factory-original macOS |
Note – Internet Recovery (Option and Shift+Option combos) requires an active internet connection via DHCP. It downloads the installer from Apple's servers.
Firmware Password
Some Intel Macs may have a firmware password set. This password is required to boot into Recovery or from an external disk. If the firmware password is unknown:
- The Mac will show a lock icon at startup when attempting Recovery
- The firmware password must be entered to proceed
- If the password is lost, the Mac must be taken to Apple or an Apple Authorized Service Provider for removal (proof of purchase required)
Note – Firmware passwords only apply to Intel Macs. Apple Silicon Macs use Activation Lock instead.
Troubleshooting
| Issue | Cause | Resolution |
|---|---|---|
| Recovery Mode doesn't load (boots straight to macOS or login) | Key combo not pressed early enough or using wrong keyboard | Use the Mac's built-in keyboard. Restart and press Command + R immediately after pressing the power button. For wireless keyboards, wait a moment for the keyboard to connect before pressing. |
| Spinning globe with exclamation mark | Internet Recovery can't connect | Check internet connection. Try a different network. Avoid captive portals (hotel/public Wi-Fi). Try Ethernet instead of Wi-Fi. Try all three key combos. |
| Macintosh HD not visible in Disk Utility | Drive not detected or hardware failure | Unplug all external devices and retry. If the drive still doesn't appear, the Mac may need hardware service. |
| Erase fails in Disk Utility | Volume group issue | Try clicking Erase instead of Erase Volume Group. If that fails, try choosing View → Show All Devices, selecting the physical disk, and erasing the entire disk. |
| Lock icon appears at startup | Firmware password is set | Enter the firmware password. If unknown, the Mac must go to Apple or an AASP for removal. |
| "Erase All Content and Settings" not available | Mac doesn't have T2 chip, or running macOS Big Sur or earlier | Use Method 2 (Recovery Mode) instead |
| Installation says "an error occurred" | Network or server issue | Ensure a stable broadband connection using DHCP. Try a different network. Avoid 802.1X or PPPoE connections without a router handling PPPoE. |
| Mac won't activate after erase | No internet connection or Activation Lock | Connect to Wi-Fi or Ethernet. If Activation Lock is present, sign in with the Apple Account that was previously linked. If unknown, the original owner must remove the device from their Apple Account. |
| Wrong macOS version gets installed | Used the wrong Recovery key combo | Re-enter Recovery with the correct key combo. ⌘+R = latest installed; Option+⌘+R = latest compatible; Shift+Option+⌘+R = factory original. |
Quick Reference
| Task | Action |
|---|---|
| Boot to Recovery (Intel) | Restart → Immediately hold Command + R |
| Boot to Internet Recovery (latest macOS) | Restart → Immediately hold Option + Command + R |
| Boot to Internet Recovery (factory macOS) | Restart → Immediately hold Shift + Option + Command + R |
| Erase All Content and Settings (T2 chip only) | System Settings → General → Transfer or Reset → Erase All Content and Settings |
| Erase disk in Recovery | Disk Utility → Select Macintosh HD → Erase → APFS → Erase Volume Group |
| Reinstall macOS | Recovery utilities → Reinstall macOS → Select Macintosh HD → Follow prompts |
| Check if Mac is Intel | Apple menu → About This Mac → Look for "Processor" (Intel) vs. "Chip" (Apple Silicon) |